The first step in creating 360 videos, is recording with a 360 degree camera systems. These currently range in price from $100 to hundreds of thousands. Most of the basic principles of shooting and editing 360 VR are exactly the same for all of those systems, so it makes sense to start experimenting and learning with something that is not as expensive. The simplest and cheapest 360 camera option I have found is the Samsung Gear 360. There are two totally different models with the same name, usually differentiated by the year of their release. I am using the older 2016 model, which has a higher resolution sensor, but records UHD instead of the slightly larger full 4K video of the newer 2017 Model.
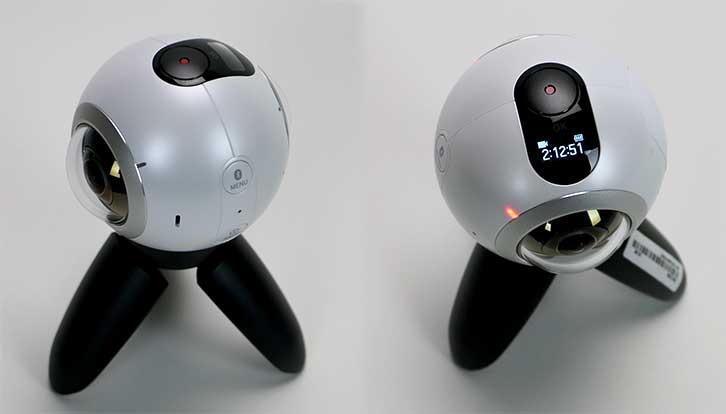 It records two fisheye views that are just over 180 degrees, from cameras situated back to back in a 2.5″ sphere. Both captured image circles are recorded onto a single frame, side by side, resulting in a 2:1 aspect ratio files. These are encoded into JPEG (7776×3888 stills) or HEVC (3840×1920 video) at 30Mb and saved onto a MicroSD card. The camera is remarkably simple to use, with only three buttons, and a tiny UI screen to select recording mode and resolution. If you have a Samsung Galaxy phone, there is a variety of other functions that allows, like remote control, and streaming the output to the phone as a viewfinder and such. Even without a Galaxy phone, it did everything I needed, to generate 360 footage to stitch and edit with but it was cool to have a remote viewfinder for the driving shots.
One of the big challenges of shooting with any 360 camera, is how to avoid getting gear and rigging in the shot, since the camera records everything around it. Even the tiny integrated tripod on the Gear360 is visible in the shots, and putting it on the plate of my regular DSLR tripod fills the bottom of the footage. My solution was to use the thinnest support I could, to keep the rest of the rigging as far from the camera as possible, and therefore smaller from its perspective. I created a couple options to shoot with that are pictured below. The results are much less intrusive in the resulting images that are recorded.
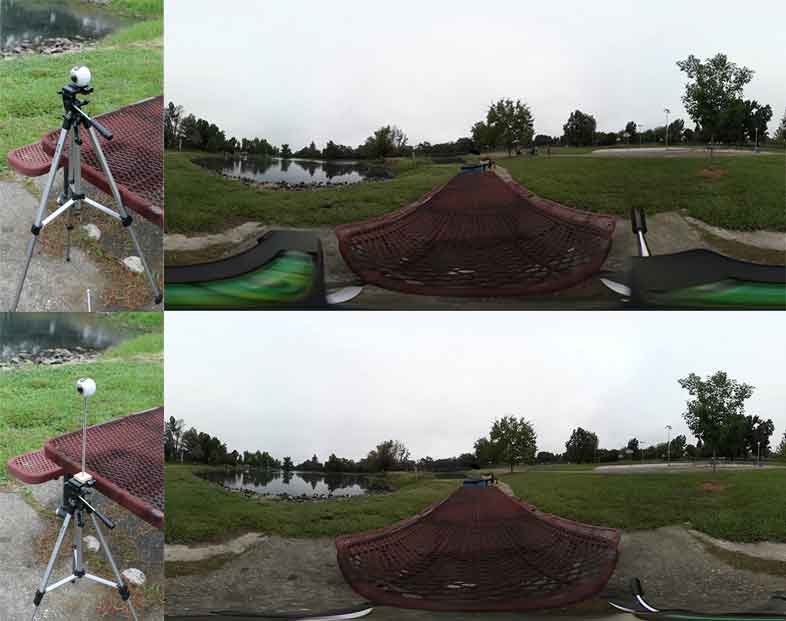 Obviously besides the camera support, there is the issue of everything else in the shot including the operator. Since most 360 videos are locked off, an operator may not be needed, but there is no “behind the camera” for hiding gear or anything else. Your set needs to be considered in every direction, since it will all be visible to your viewer. If you can see the camera, it can see you.
Once you have recorded your footage, you will want to see what it looks like. The dual spherical image file recorded by the Gear 360 is not directly usable in most applications, and needs to be processed to generate a single equirectangular projection, stitching the images from both cameras into a single continuous view.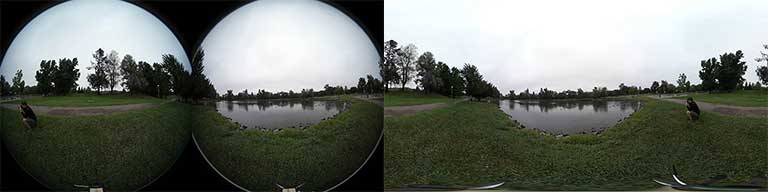
There are a number of ways to do this. One option is to use the application Samsung packages with the camera, Action Director 360. You can download the original version here, but will need the activation code that came with the camera in order to use it. Upon import, the software automatically processes the original stills and video into equirectangular 2:1 H.264 files. Instead of exporting from that application, I pull the temp files that it generates on media import, and use them in Premiere. C:\Users\[Username]\Documents\CyberLink\ActionDirector\1.0\360 is where they should be located by default. While this is the simplest solution for PC users, it introduces an extra transcoding step to H.264 (after the initial H.265 recording) and I frequently encountered an issue where there was a black hexagon in the middle of the stitched image. Activating Automatic Angle Compensation in the Preferences->Editing panel gets around this bug, while trying to stabilize your footage to some degree. I later discovered that Samsung had released a separate version 2 of Action Director available for Windows or Mac, which solves this issue. But I couldn’t get the stitched files to work directly in the Adobe apps, so I had to export them, which was yet another layer of video compression. You will need a Samsung activation code that came with the Gear360 to use any of the versions, and both versions took twice as long to stitch a clip as its run time on my P71 laptop.

An option that gives you more control over the stitching process is to do it in After Effects. Adobe’s recent acquisition of Mettle’s SkyBox VR toolset makes this much easier, but it is still a process. Currently you have to manually request and install your copy of the plugins as a Creative Cloud subscriber. Once you have Skypbox Suite AE installed, you can use the Skybox Converter effect to convert from the Gear360’s fisheye files to the equirectangular assets that Premiere requires for editing VR. Unfortunately Samsung’s format is not one of the default conversions supported by the effect, so it requires a little more creativity. The two sensor images have to be cropped into separate comps, and with plugin applied to each of them. Setting the Input to Fisheye and the Output to Equirectangular for each image will give the desired distortion. A feathered mask applied to the circle to adjust the seam, and the overlap can be adjusted with the FOV and Re-orient Camera values.
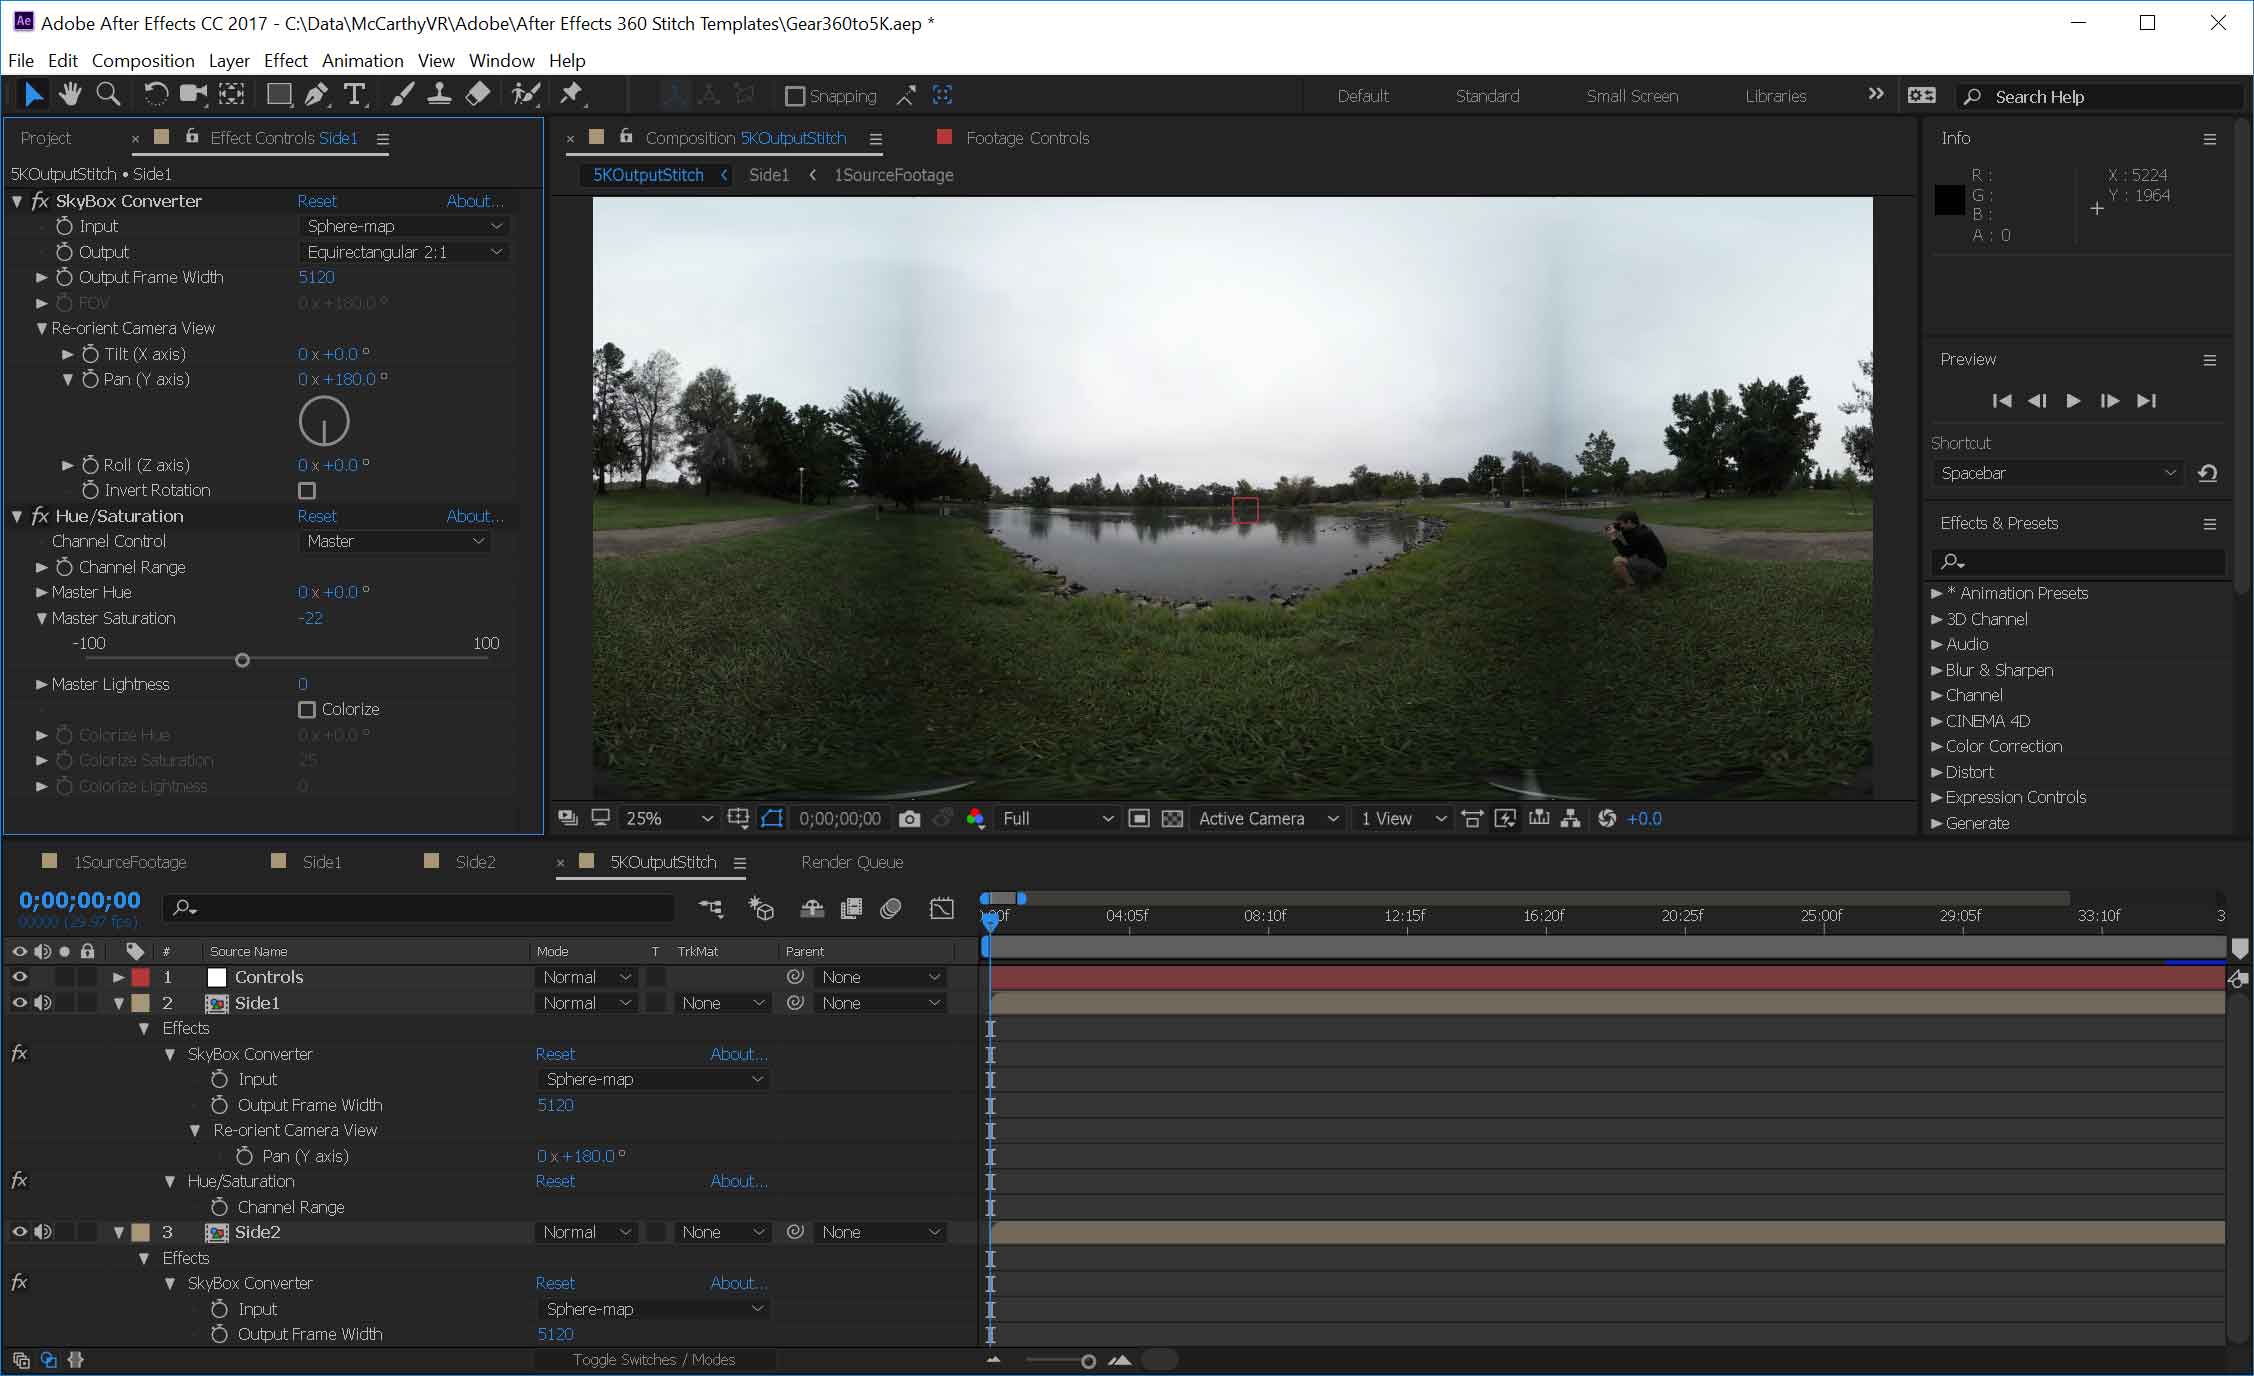
Since this can be challenging to setup, I have posted an AE template that is already configured for footage from the Gear 360. The included directions should be easy to follow, and the projection, overlap, and stitch can be further tweaked by adjusting the position, rotation and mask settings in the sub-comps, and the re-orientation values in the Skybox Converter effects. Hopefully once you find the correct adjustments for your individual camera, they should remain the same for all of your footage, unless you want to mask around an object crossing the stitch boundary. More info on those types of fixes can be found here. It took me 5 minutes to export 60 seconds of 360 video using this approach, and there is no stabilization or other automatic image analysis.
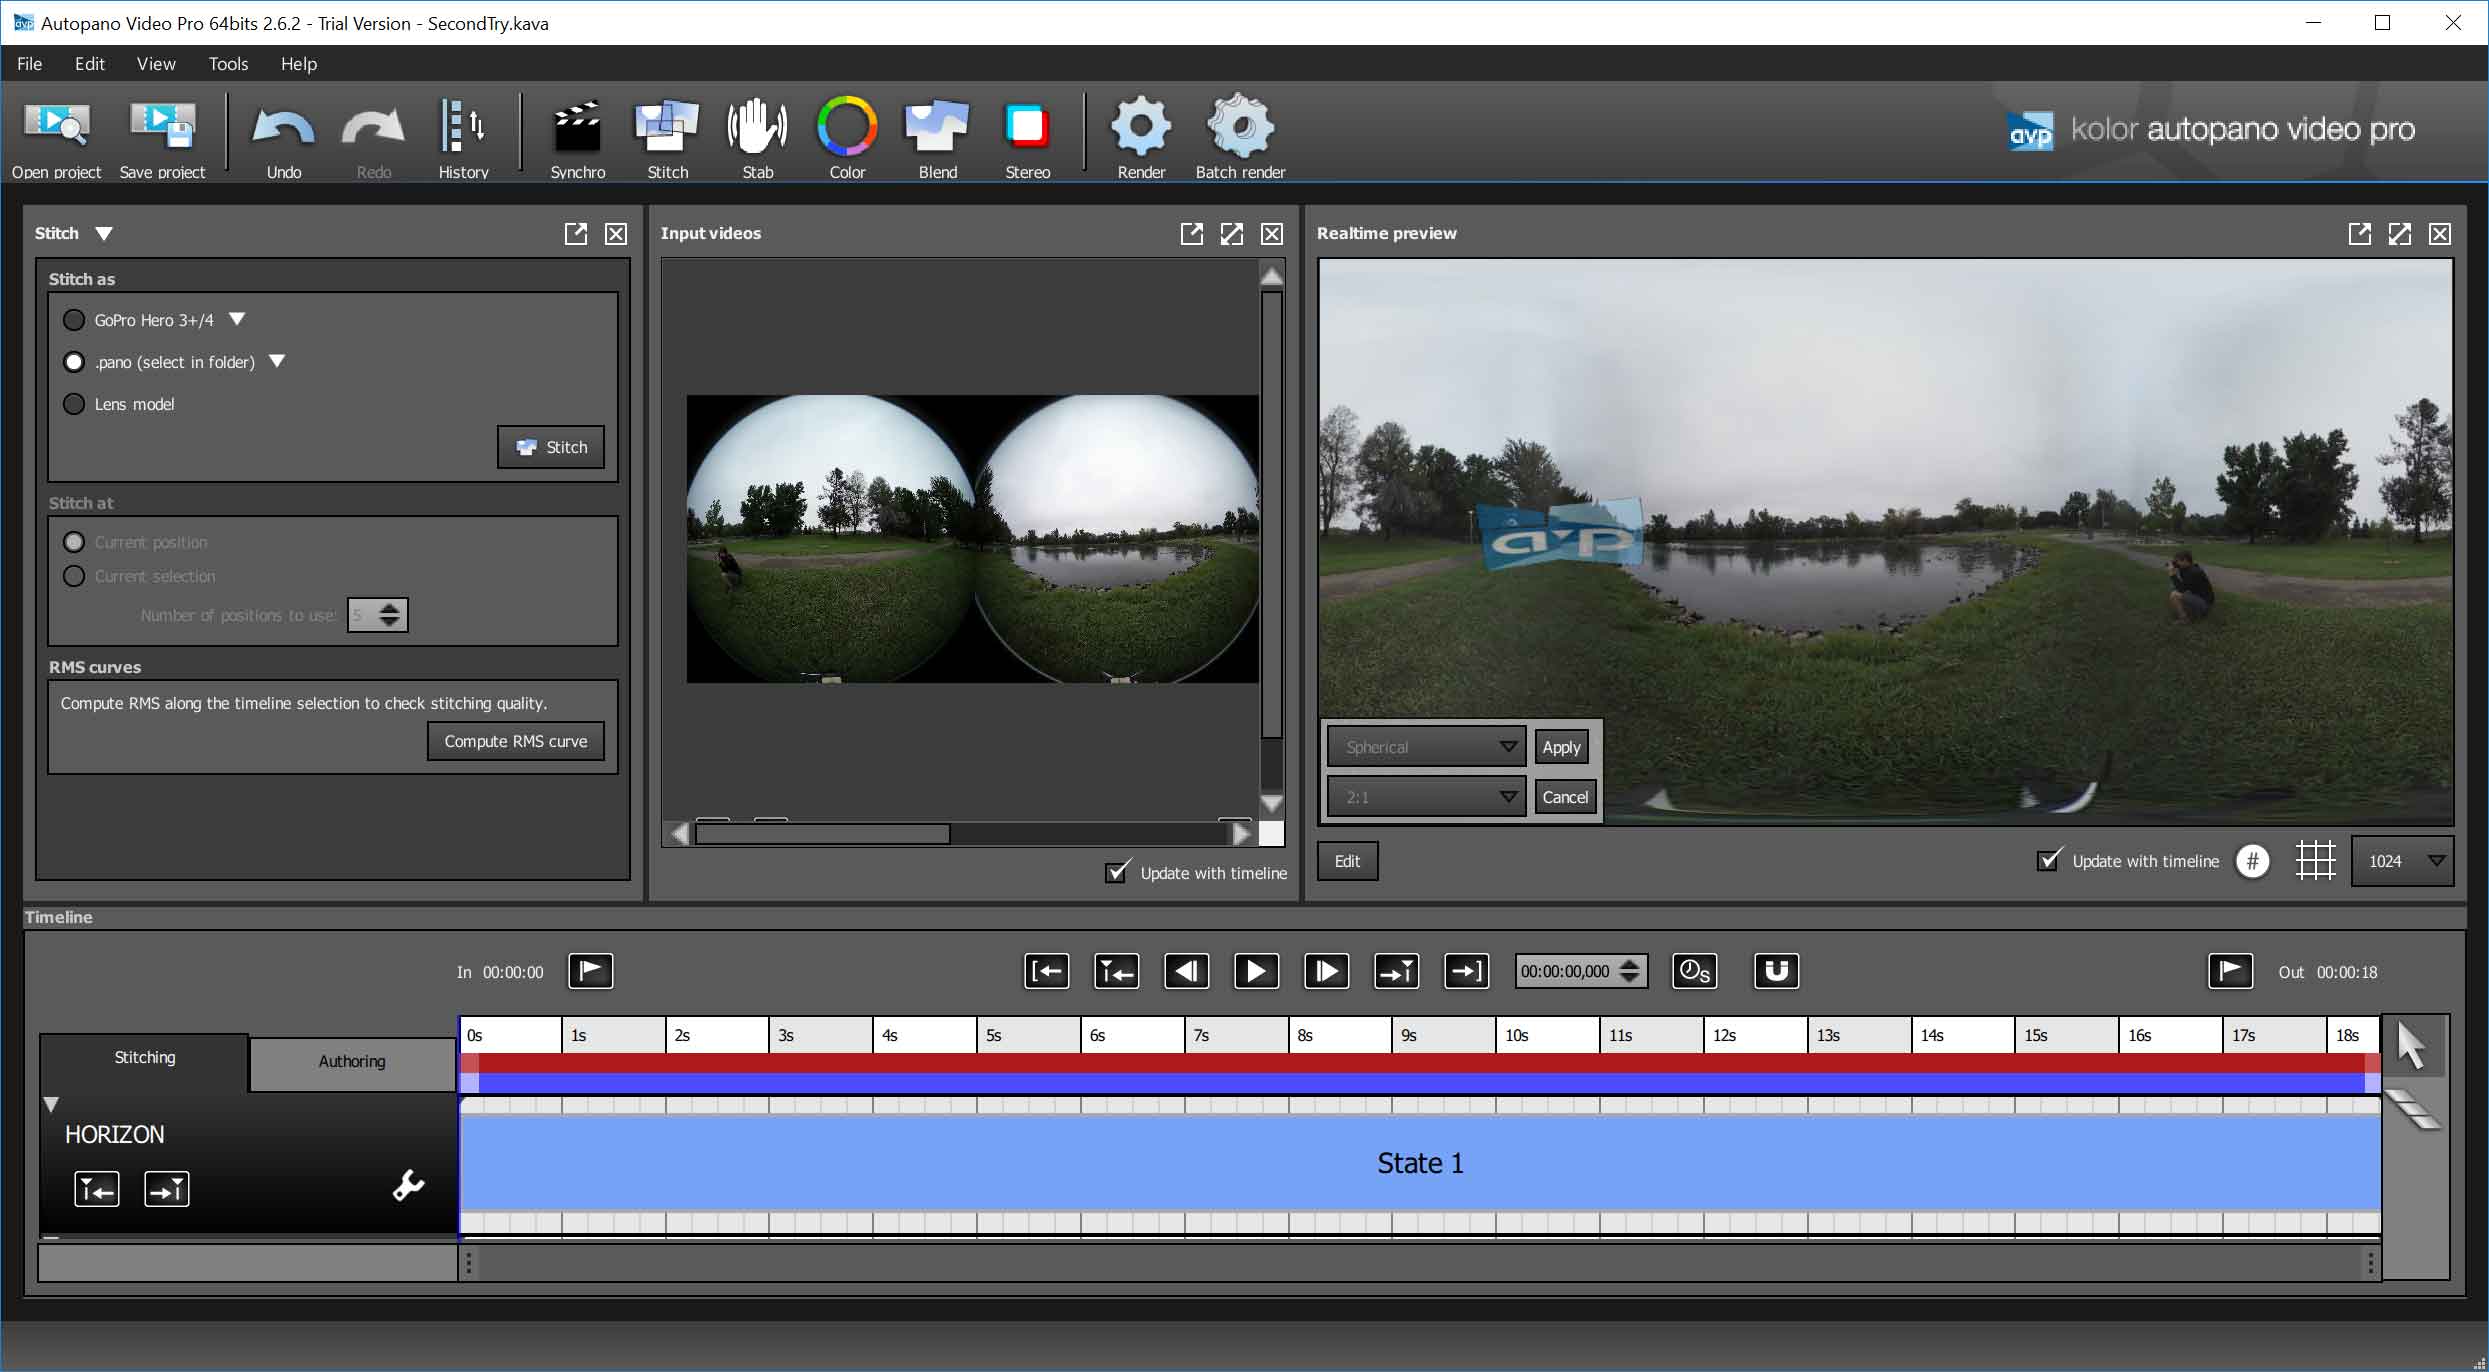
There are also a couple of dedicated stitching applications out there. As part of their investment into VR workflows, GoPro bought Kolor a couple years, makers of Autopano Video Pro. It is a dedicated application for stitching video spheres, and has options for stabilization, color correction, stereo stitching, and a variety of other advanced features. You can experiment with the demo version, but it does cost some money to get the fully functional version. It also adds some VR editing plugins to Premiere Pro upon installation and activation. There are also AVP templates specifically for the Gear 360 available online if you want to go that route. The one I found here requires you to make a duplicate copy of your dual image source clip, which may be a limitation of the program itself. AVP will allow you to export in Cineform or ProRes if you have the codec available, as well as directly to H.264. I found render times to be quite good, 3 minutes to analyze and stabilize my one minute clip, and 90 sec to export the stitched file.
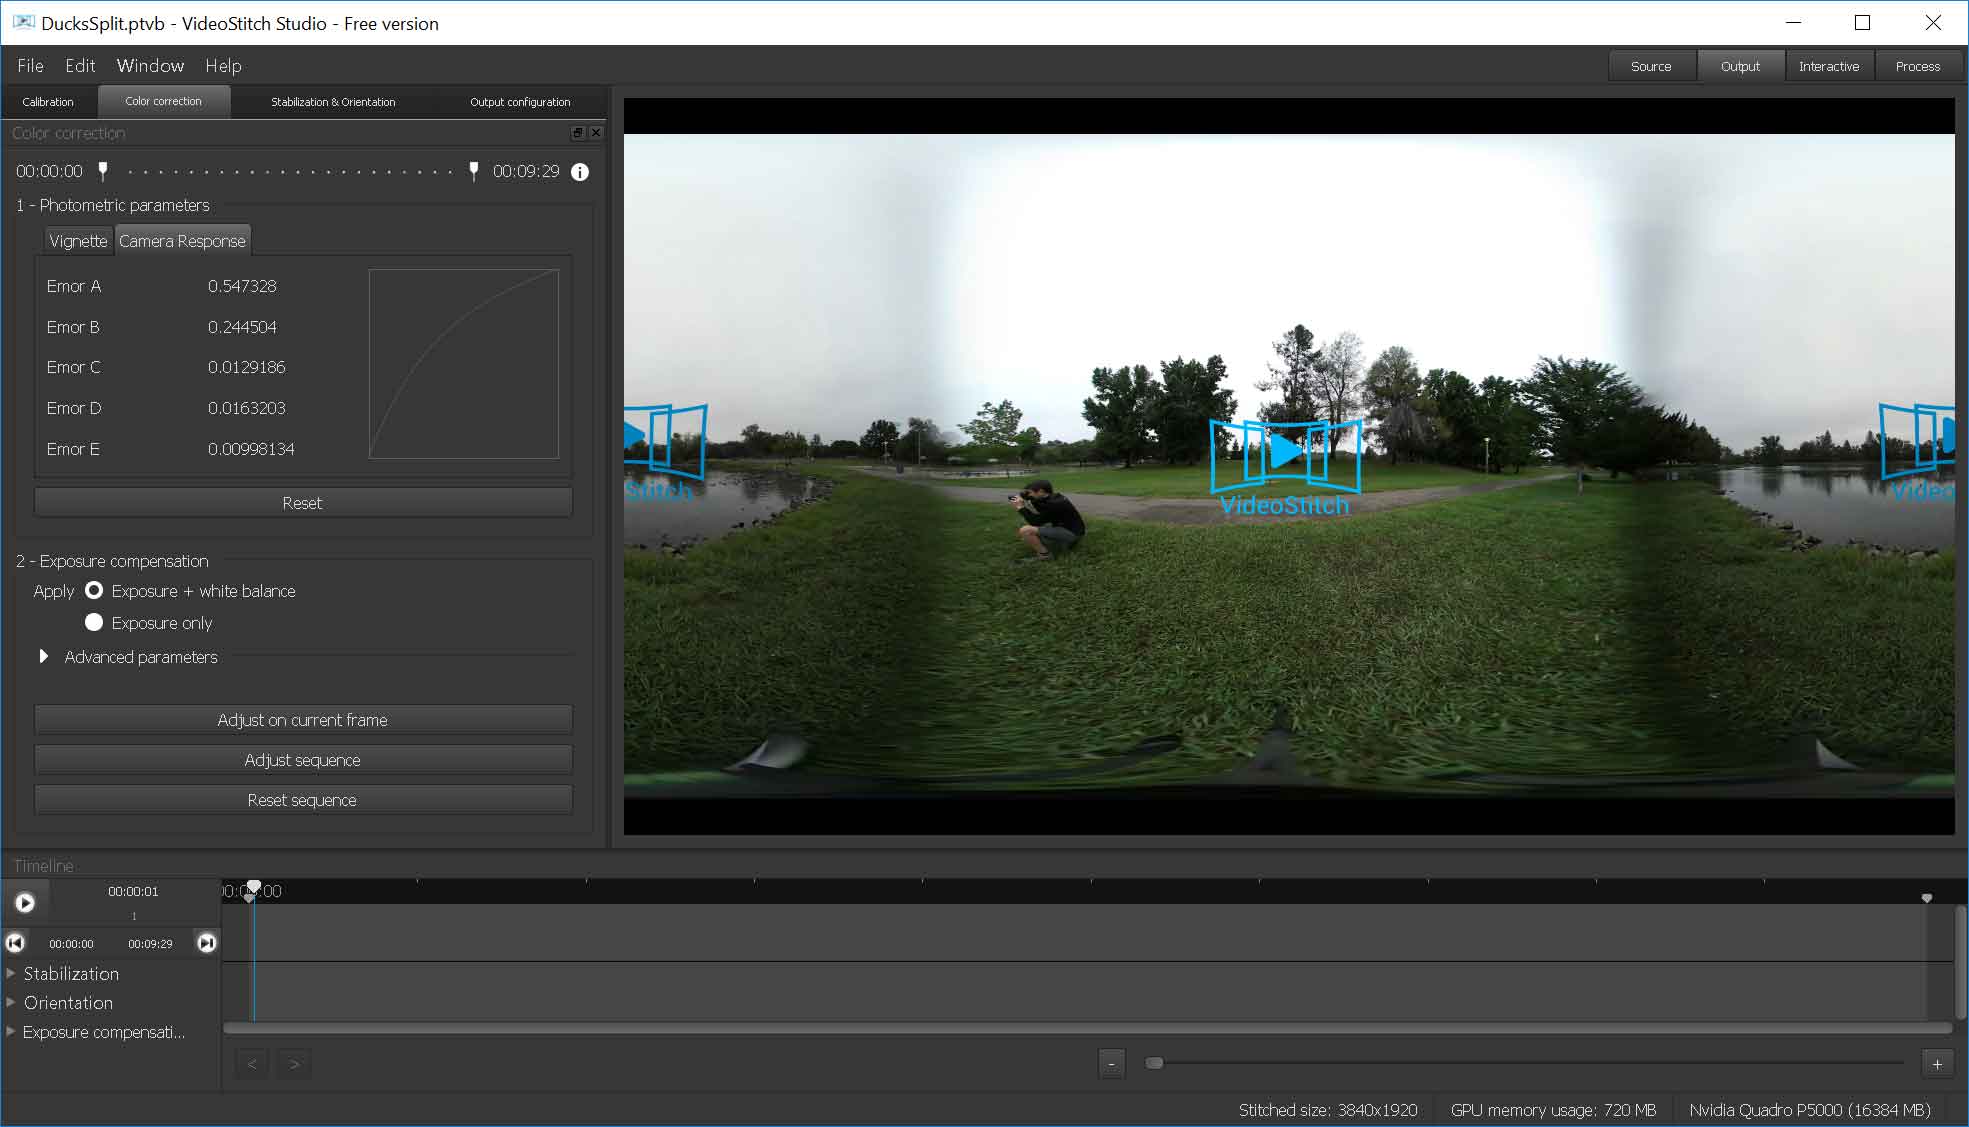
Orah makes Video-Stitch Studio, which is a similar product, with a slightly different feature set and approach. One limitation I couldn’t find a way around, is that the program expects the various fisheye source images to be in separate files, and unlike AVP, I couldn’t get the source cropping tool to work without rendering the dual fisheye images into separate square video source files. There should be a way to avoid that step, but I couldn’t find one. So splitting the source file and rendering separate fisheye spheres adds a step and render time, and my one minute clip took 11 minutes to export. So this is a slower option, which might be significant if you have hours of footage to process instead of minutes.
Clearly there are a variety of ways to get your raw footage stitched for editing. The results vary greatly between the different programs, so I made video to compare the different stitching options on the same source clip. My first attempt was with a locked off shot in the park, seen in my stills above, but that shot was too simple to see the differences, and it didn’t allow for comparison of the stabilization options available in some of the programs. So I shot some footage from a moving vehicle to see how well the motion and shake would be handled by the various programs. The result is now available on YouTube, fading between each of the five labeled options over the course of the minute long clip. (I would categorize this as testing how well the various applications can handle non-ideal source footage, which happens a lot in the real world.)
I didn’t feel that any of the stitching options were perfect solutions, so hopefully we will see further developments in that regard in the future. You may want to explore them yourself to determine which one best meets your needs. All of these processing tests were done on a maxed out Thinkpad P71 with an NVidia Quadro P5000 GPU, so it is very do-able to create 360 videos on a high end laptop, but render times may take longer on an older system. Once your footage is correctly mapped to equirectangular projection and the projects are rendered and exported, (I recommend Cineform or DNxHR) you are ready to edit your processed footage in Premiere. My next article will get into the details of how to do that, and map ambisonic surround audio if desired, before encoding final output to upload to Facebook or Youtube.

Pingback: Review: GoPro Fusion 360 camera - Randi Altman's postPerspective
The support for the Samsung Gear 360 with the dedicated ActionDirector Gear 360 software is a shame for this company!
After purchasing a Gear360 I wanted to install the dedicated software: Gear 360 ActionDirector (64 bits) after installation, you must activate the Gear 360 ActionDirector software (64 bits), there are 3 validation possibilities, By USB connection with the Gear 360… it doesn’t work, the application can’t connect to the server… I tried everything (modifying the Host file), and 3 other solutions which all failed ! then a Gear360 which is useless, because it is not possible to output a 360° file which is processed with H.264 equirectangular 2:1