
This year, I oversaw the editing process for a large international film production. This involved setting up a collaborative editing facility at the director’s home, and there was a lot of footage in the project. While there was “only” 6.5 TB of offline DNxHR files, they shot around 150TB of Red footage that we needed to have available for onsite VFX, conform, etc. Once we finished the edit, we were actually using 40TB of that footage in the cut, which we needed at another location for collaboration. So I was in the market for some large storage solutions.
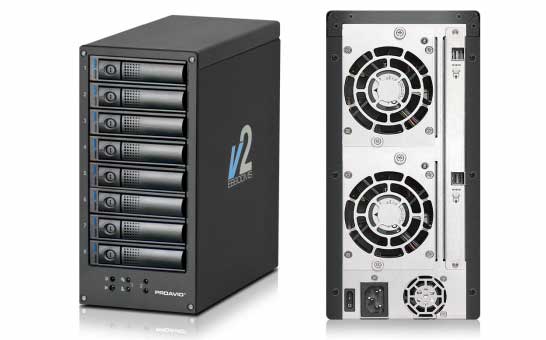 Our last few projects have been small enough to fit on 8-Bay desktop eSAS arrays, which are quiet and relatively cheap. (Act of Valor was on a 24TB array of 3TB drives in 2010, while 6Below was on 64TB arrays of 8TB drives.) Now that we have 12TB drives available, that allows those to go to 96TB, but we needed more capacity than that. With that much data on a single spindle, you lose more capacity to maintain redundancy, with RAID6 dropping the raw space to 72TB. Large numbers of smaller drives offer better performance, and more efficient redundancy, as well as being cheaper per TB, at least for the drives. But once you get into large rack mounted arrays, they are much louder, and need to be located farther from the creative space, requiring different interconnects than direct attached SAS. My initial quotes were for a 24x 8TB solution, offering 192TB storage, before RAID6 and such left us with 160 usable Terabytes of space, for around $15K.
I was in the process of ordering one of those from ProAvio when they folded last Thanksgiving, resetting my acquisition process. I looked into building one myself, with an external SAS storage chassis and bare drives, when I stumbled across refurbished servers on eBay. There are numerous companies selling used servers, that include storage chassis, backplanes and RAID cards, for less than just this case costs new.
And the added benefit is that these include a fully functioning Xeon level computer system as well. At the very least, this allows you to share the storage over a 10GbE network, and in our case we were also able to use it as a render node, and eventually a user workstation. That worked well enough that we will be using similar items for future artist stations, even without the storage requirement. I have setup two separate systems so far, for different needs, and learned a lot in the process, and thought I would share some of those details on here.
Why use refurbished systems for top end work? Most of the CPU advances in the last few years have come in the form of increased core counts and energy efficiency. This means that in lightly threaded applications, CPUs from a few years ago will perform nearly as well as brand new ones. And previous generation DDR3 RAM is much cheaper than DDR4. PCIe 3.0 has been around for many generations, but older systems won’t have Thunderbolt3 or may not even have USB3. USB3 can be added with an expansion card, but Thunderbolt will require a current generation system. The other primary limitation is finding systems that have drivers for running Windows 10, since those systems are usually designed for Linux and Windows Server. Make sure you verify the motherboard will support Windows 10 before you make a selection. (Unfortunately Windows 7 is finally dying, with no support from MS or current application releases.)
 Workstations and servers are closely related at the hardware level, but have a few design differences. They use the same chipsets and Xeon processors, but servers are designed for remote administration in racks, while workstations are designed to be quieter towers, with more graphics capability. But servers can be utilized for workstation tasks with a few modifications, and used servers can be acquired very cheaply. Also, servers frequently have the infrastructure for large drive arrays, while workstations are usually designed to connect to separate storage for larger data sets.
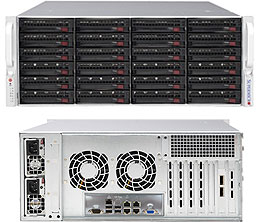
Recognizing these facts, I set out to build a large repository for my 150TB of Red footage, on a system that could also run my Adobe applications and process the data. 8TB drives are currently the optimal size for storing the most data for the lowest total price, but that will change over time. 150TB of data required more than 16 drives, so I focused on 4U systems with 24 drive bays. 192TB of RAW storage, minus 2 drives for RAID6 (16TB) and 10% for Windows overhead leaves me with 160TB of storage space reported in Windows. 4U chassis also allow for full height PCIe cards, which is important for modern GPUs. Finding support for full height PCIe slots is probably the biggest challenge in selecting a chassis, as most server cards are low profile. A 1U chassis can fit a dual slot GPU if it is designed to accept one horizontally, but cooling may be an issue for workstation cards. A 2U chassis has the same issue, so you must have a 3u or 4U chassis to install full height PCIe cards vertically, and the extra space will help with cooling and acoustics as well.
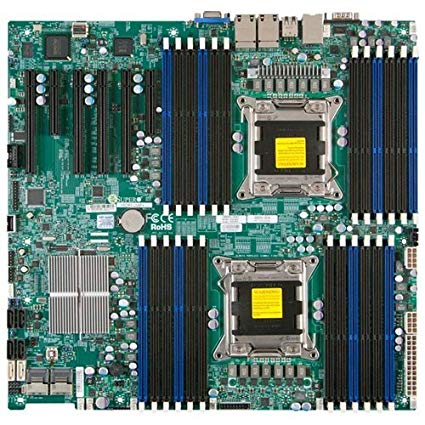
Dell and HP offer options as well, but I went with Supermicro, as their design fit my needs the best. I got a 4U chassis with a 24-port pass through SAS back plane for maximum storage performance, and a X9DRi-LNF4+ motherboard that was supposed to support Windows 7 and Windows 10. The pass through backplane gave full speed access to 24 drives over 6 quad channel SFF-8643 ports, but required a 24port RAID card, and more cables. The other option is a port multiplying backplane, which has a single or dual SFF-8643 connection to the RAID card. This allows for further expansion, at the expense of potential complexity and latency. 12G SAS is 1.5GB/s per lane, so in theory, a single SFF-8643 cable can pass up to 6GB/s, which should be as much as most RAID controllers can handle anyway.
The system cost about $2K, plus $5K for the 24 drives, which is less than half of what I was looking at paying for a standalone external SAS array, and included a full computer with 20 CPU cores and 128GB RAM. I considered it a bit of a risk, as I had never done something at that scale, and there was no warranty, but we decided that the cost savings was worth a try. It wasn’t without its challenges, but it is definitely a viable solution for a certain type of customer. (One with more skills than money).
The machine ran loud, as was to be expected with 24 drives and 5 fans, but it was installed in a machine room, with our rack mount UPS and network switches, so the noise wasn’t a problem. I ran 30′ USB and HDMI cables to the user station in the next room, and frequently controlled it via VNC anyway. I added a Pascal Quadro card, a 10GbE card, and a USB3 card, as well as a SATA SSD for the OS, in an optional 2.5″ drive tray. Once I got the array setup and initialized, it benchmarked at over 3000MB/s transfer rate, which was far more than I needed for Red files, but I won’t turn down excess speed for future use with uncompressed 8K frames, or 40GbE network connections.
I initially had trouble with Win10, getting blue screen APCI BIOS errors on boot, but Win7 worked flawlessly. I used Win7 for a month, but I knew I would need to move to Win10 within the year, and was looking at building more systems, so I knew I needed to confirm that Win10 could work successfully. I eventually determined that it was Windows Update, which has always been the bane of my existence when using Win10, which was causing the problem. It was automatically updating one of the chipset drivers to a version that prevented the system from booting. The only solution was to prevent Win10 from accessing the internet until after the current driver was successfully involved. The only way to disable Windows update during install is to totally disconnect the system from the network. Once I did that, everything worked great, and I ordered another system.
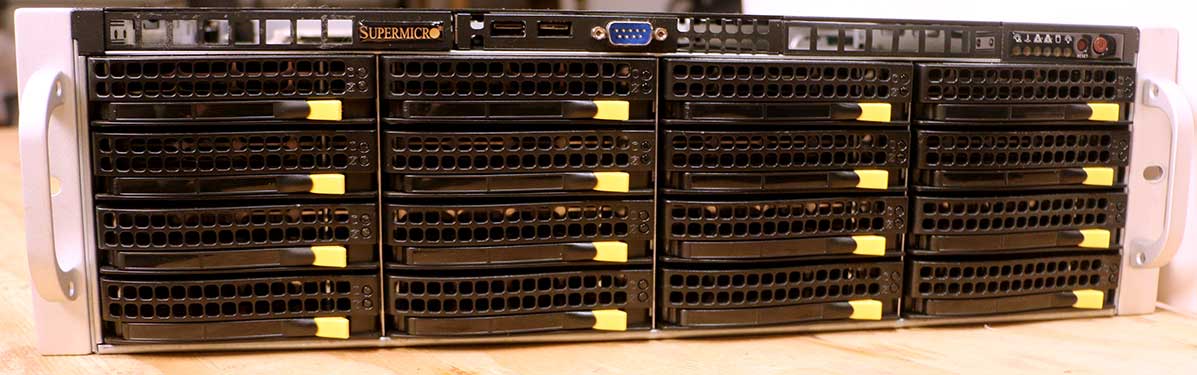 The second time I didn’t need as much data, so I went with a 16-bay 3U chassis, which was a mistake. It ran hotter and louder with less case space, and it doesn’t fit GPUs with top mounted power plugs, or full sized CPU coolers. So regardless of how many drive bays you need, I recommend buying a 24-bay 4U system, just for the space it gives you. (the Supermicro 36 bay systems look the same from the front, but have less space available, as the extra 12 bays in the rear constrain the motherboard similar to a 2U case.) The extra space also gives you more options for cards and cooling solutions.
 I tried an NVMe drive this time as well, in a PCIe slot, and while it works, booting is not an option without modding the BIOS, which I was not about to experiment with. So I installed the OS on a SATA SSD again, and was able to adapt it to one of the 16 standard drive bays, as I only needed 8 of them for my 64TB array. This system had a pass through backplane with 16 single port SATA connectors, which is much messier than the SFF-8643 connectors, but it works, and is simpler to mix the drives between the RAID card and the motherboard, which is a plus.
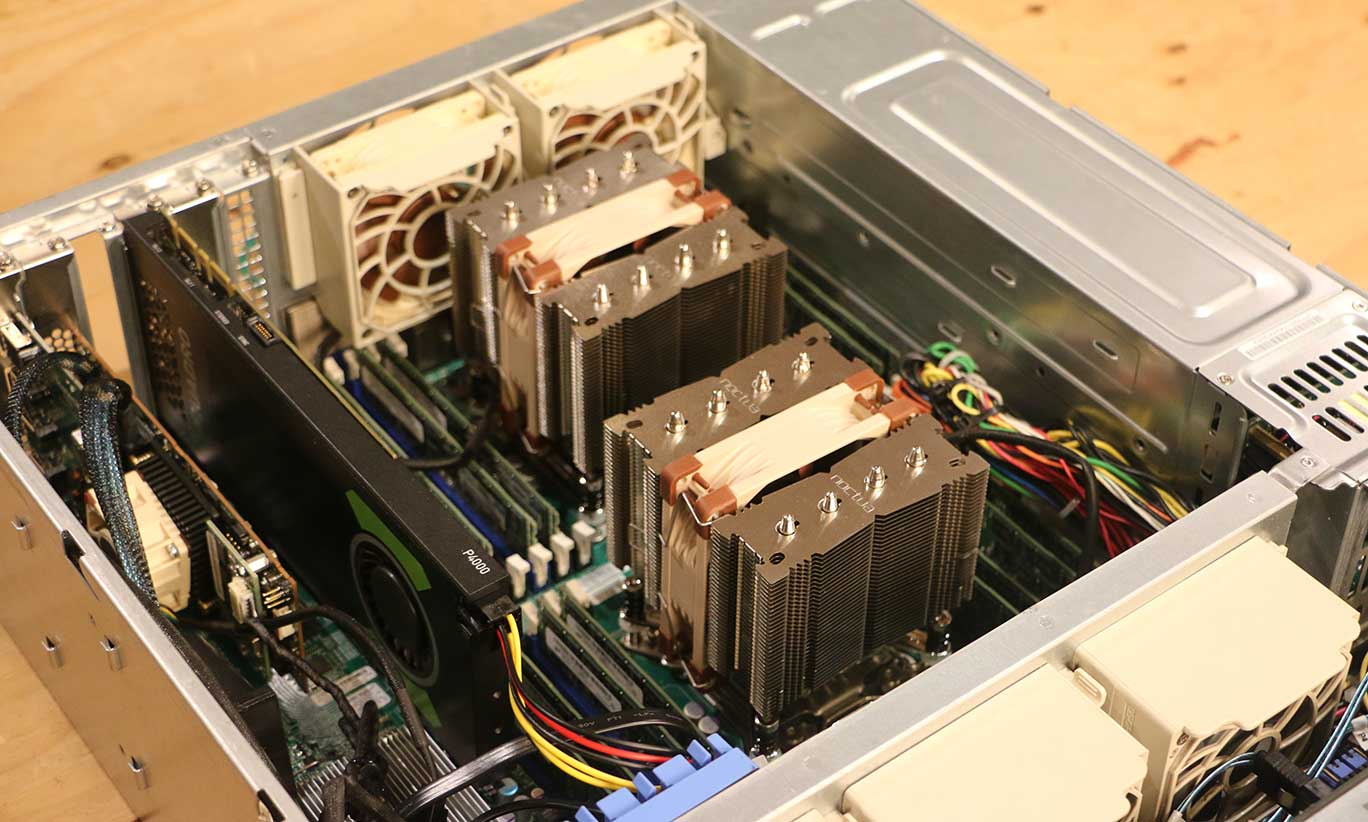
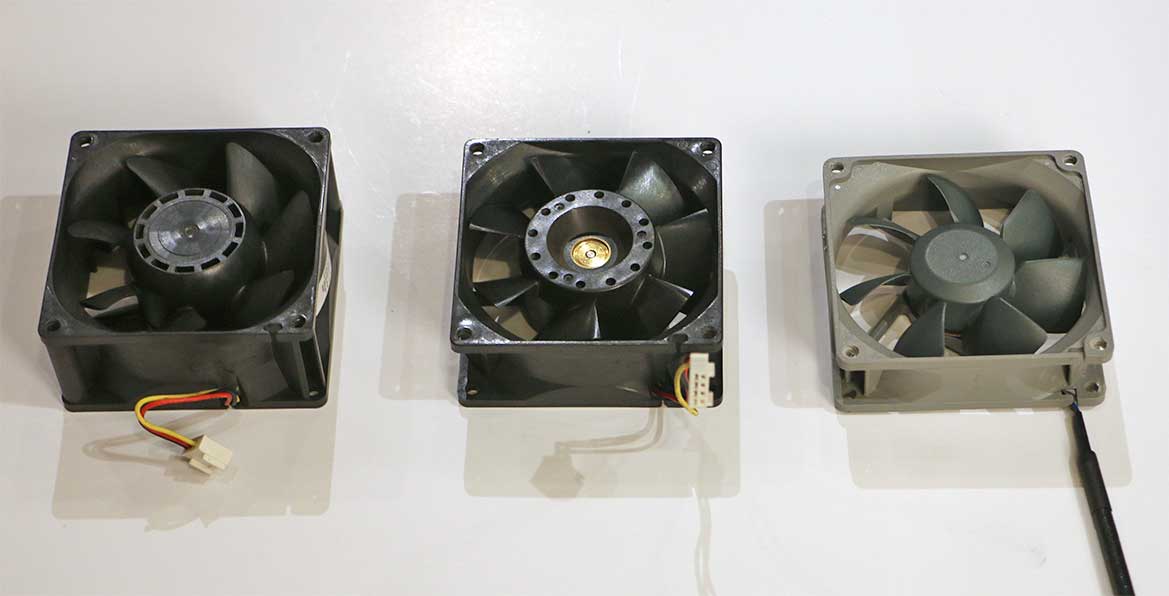 When I received the unit, it was FAR louder than the previously ordered 4U one, for a number of reasons. It had 800W power supplies, instead of the 920W-SQ (Super-quiet) ones in my first one, and the smaller case had different airflow limitations. I needed this one to be quieter than the first system, as I was going to be running it next to my desk, instead of in a machine room, so I set about redesigning the cooling system, which was the source of 90% of the noise. I got the power supplies replaced with 920SQ ones, although the 700W ones are supposed to be quiet as well, and much cheaper. I replaced the 5x 80mm 5000RPM jet engine system fans with Noctua 1800RPM fans, which made the system quiet, but didn’t provide enough air flow for the passively cooled CPUs. So I then ordered two large CPU coolers with horizontally mounted 92mm fans, to cool the Xeon chips, replacing the default passive heatsinks that utilize case airflow for cooling. I also installed a 40mmx20 fan on the RAID card that had been overheating even with the default jet engine sounding fans. Once I had those 8 Noctua fans installed, the system was whisper quiet, and could render at 100% CPU usage without throttling or overheating.
 So I was able to build a system with 16 cores and 128GB RAM for about $1500, not counting the 64TB storage which doubles that price, and the GPU, which I already had. (Although a GTX1660 can be had for $300, which would be a good fit in that budget range.) The first one I built had 20 cores at 3Ghz, and 128GB RAM for about $2000, plus $5000 for the 192TB storage. I was originally looking at getting just the 192TB external arrays for twice that price, so by comparison this was half the cost, with a high end computer tossed in as a bonus.
The things I plan to do differently ordering in the future include:
Always get the 4U chassis for maximum flexibility
Make sure to get the quiet power supplies ($50-$150)
Budget to replace all the fans and CPU coolers if noise is going to be an issue ($200)
But other than that, it was a largely positive experience that exceeded my expectations. At the end of the day, you should be able to get a powerful dual socket system ready to support massive storage volume, for around $2000. This solution makes the most sense when you need large capacity storage as well as the editing system, otherwise some of what you are paying for (usable drive slots) is going to waste.