
I am testing out and reviewing the Loupedeck+ edit controller in the Adobe Creative Cloud apps. This article is Part 1 of 2, where I talk about my initial reactions to trying out the device, and the process of getting it working with my systems. It will take a while to really get used to the functionality that the device has to offer, so I will be using it on my next big film project. Then I will write up a follow on piece in a few months detailing my experiences with it once I have setup my custom settings and memorized that the functions, to give me a degree of efficiency with the tactile interface.
 I first heard about the Loupedeck idea a few months back when I saw an article describing how it operated with Adobe Lightroom Classic, giving users dedicated buttons and dials to operate many of the applications software tools and settings. After a brief glance, my main thought was: “It’d be great to have something like that for Premiere Pro.” And then around the time Premiere 2019 released, I saw it advertised that the new Loupedeck+ was now supported as a control surface for Premiere Pro. That got my attention, so I sought out a review unit from the makers of Loupedeck. During the process of arranging that, they released yet another update, adding support for After Effects and Photoshop as well.
 That brings the current list of supported Adobe applications to Lightroom 6, Lightroom Classic CC, Premiere Pro, After Effects, and Photoshop, as well as Skylum Aurora HDR, and CaptureOne, neither of which I had ever used or heard of. The unit retails for $250, and is available from Amazon, B&H, and a variety of other vendors, making it one of the most affordable dedicated physical interfaces on the market.
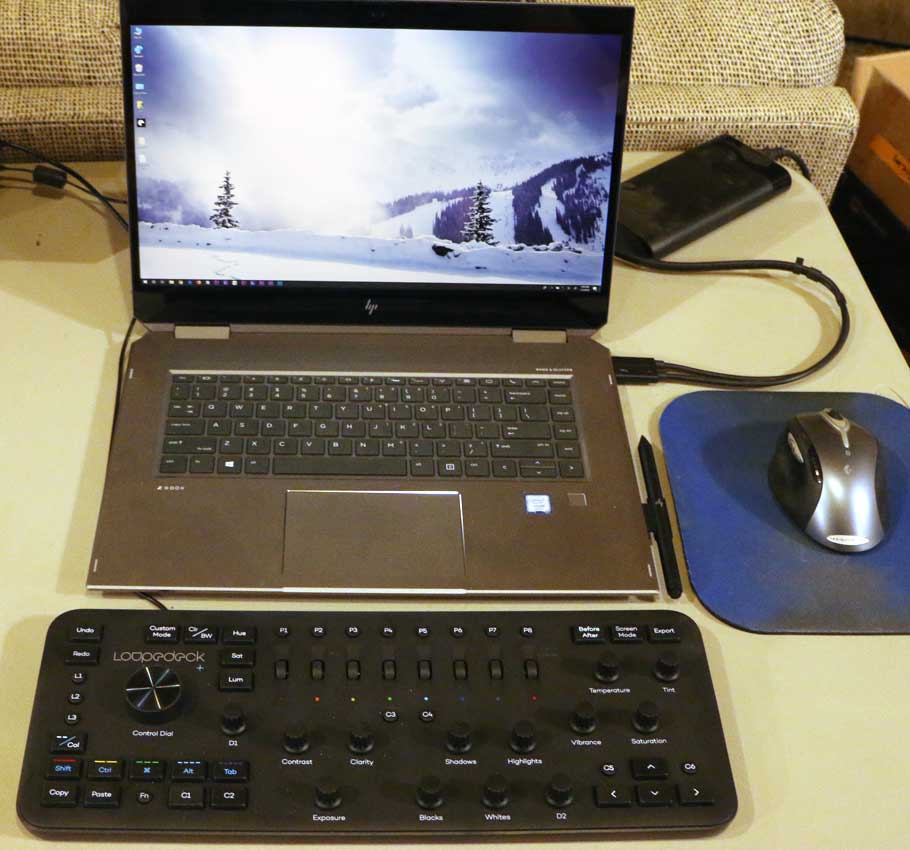
The unit is great, but there are some important limitations you should be aware of. First there are two models, the original “Loupedeck,” and the “Loupedeck+.” You definitely want the Loupedeck+, as the original model only supports Lightroom. A few tips I have are: read the directions, the most important one of which will be to install the software before connecting the unit. it will be easier to get it working that way. Also, in order to use it in Premiere, you have to select it as a “control surface” in the application preferences. Even though I had seen this screen many times, and never used it, I forgot to do that the first time I tried it. I tested it with Windows 7 and Windows 10. Windows 7 is limited to the 2018 versions of Premiere and After Effects, which have higher latency with the board than the newest releases. But I expect Premiere Pro 12 (2018) to remain popular for large projects for quite a while to come. (I did not test the Mac side at all, but all of the drivers claim to support OSX 10.12 or above.)
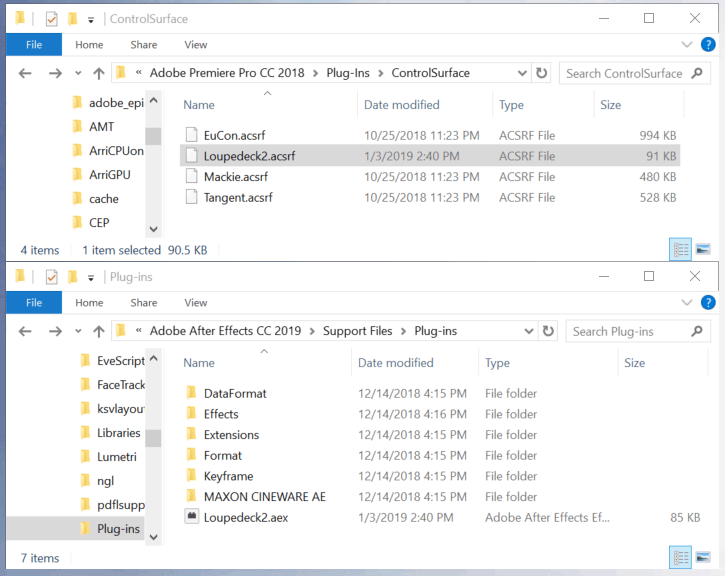 Also the current driver installer (Version 2.5) only places plugins in the 2019 Adobe folders, so you have to manually copy them into the similar locations in the 2018 application folders if you want to be able to use the Loupedeck+ with the previous generation apps.
(“…/Adobe Premiere Pro CC 2019/Plug-Ins/ControlSurfaces/Loupedeck.acsrf” and
“…/Adobe After Effects CC 2019/Support Files/Plug-Ins/Loupedeck2.aex”)
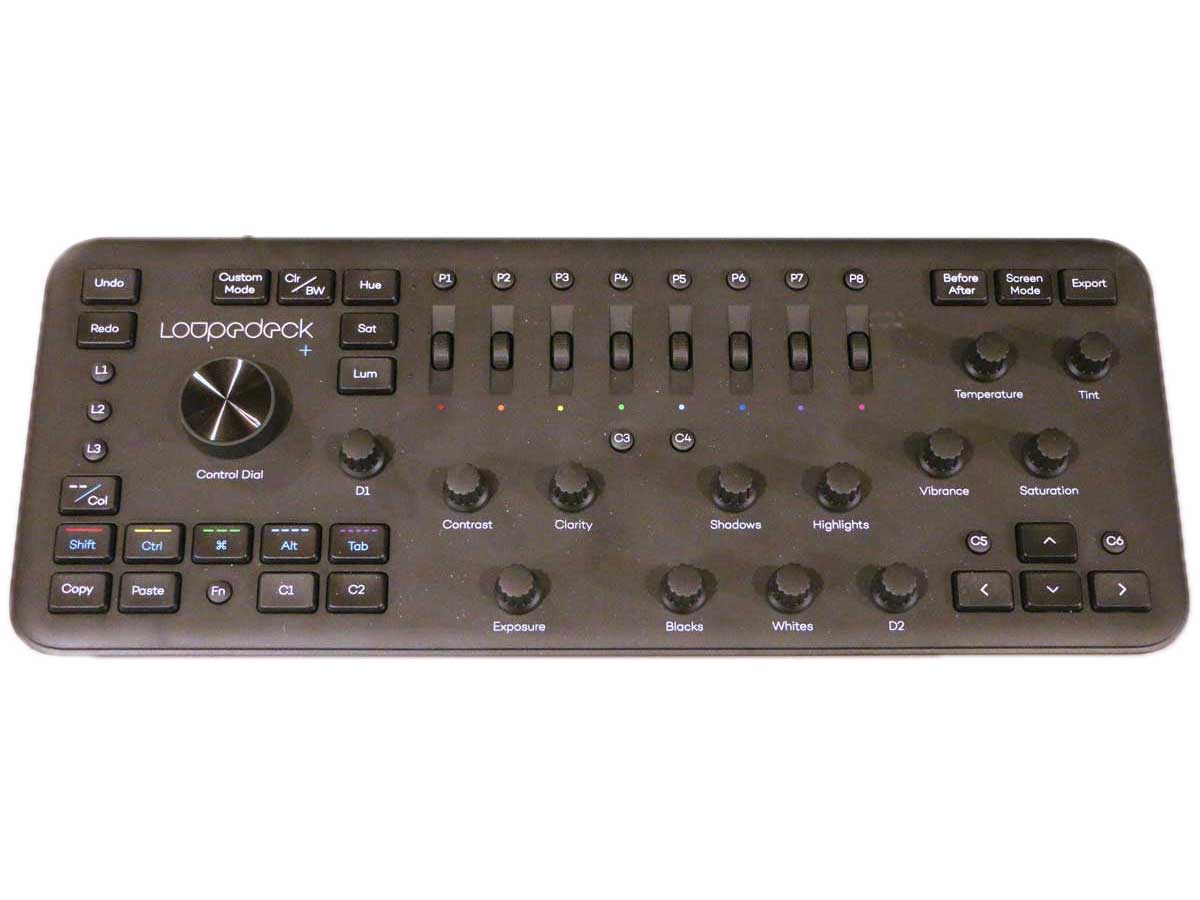
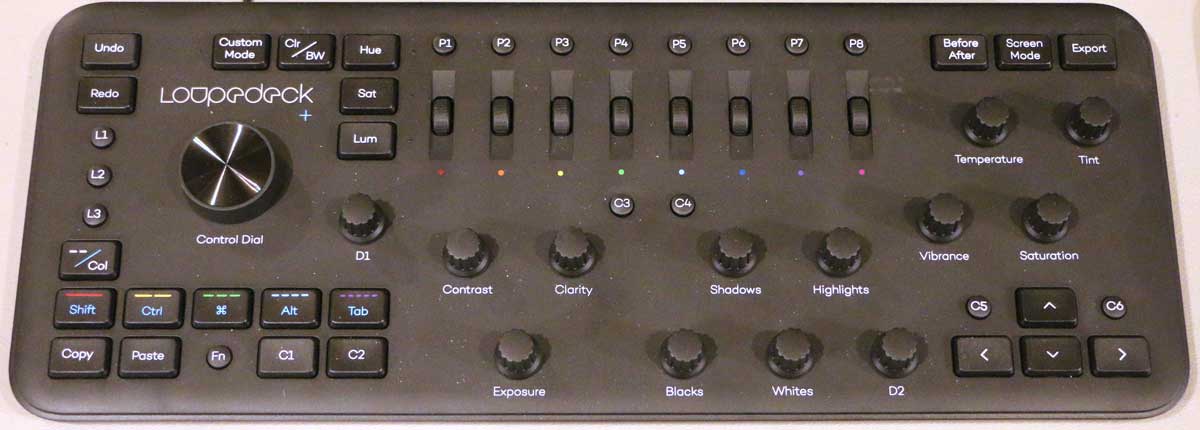
Once I had the Loupedeck+ actually working, the biggest challenge is wrapping your mind around the huge variety of options and controls available at your disposal. With the function key, and custom mode, there are a total of four layers of commands available for every knob or button. There are default mappings for most of the controls, but you will probably want to customize some of those as you adjust to working with the board. And it will take some adjustment, with so much power at your finger tips, if you can only remember how to access it all. They have grouped most of the default commands for the knob into triangular sets of three, to make it easier to keep track of them. Many controls in editing have 3 variables, like 3D layer position, anchor point, and rotation, or coloring with X,Y, and Z axis shifts for the shadows, midtones, and highlights. So there are three dominant triangles, with a few more knobs between them. Then there are 8 rollers, and a large assortment of labeled buttons.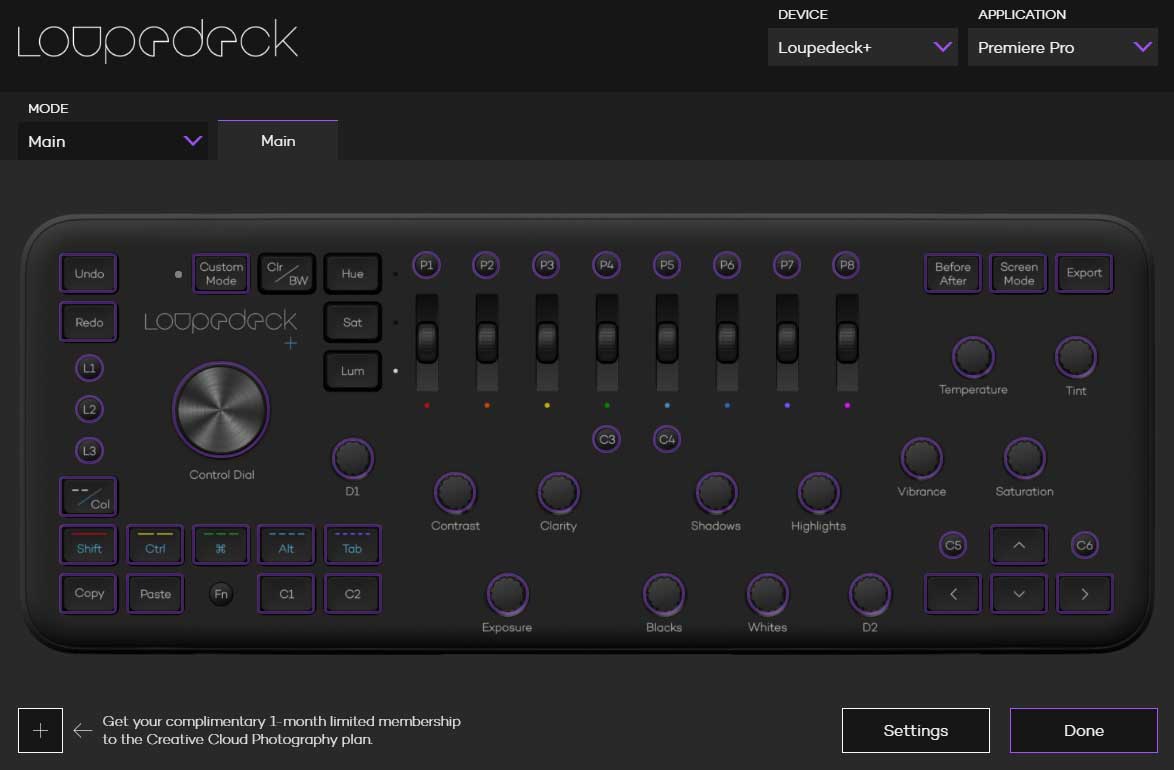
In Premiere, the main layer of functionality is mostly mapped to match the labels for color correction, to the matching variables in the Lumetri grading effect. The rest of the controls allow users to switch between panels, move the play-head or selected clips, or trim the heads and tails in various ways, among many other things. The function commands are focused on three way color correction, and the default custom commands are focused on adjusting key-frame timing and values.
I actually found the After Effects functionality easier to remember and adapt to than the Premiere commands, even though they don’t match the labels at all. The main layer has the knobs divided into three triangles, for 3 degrees of position, rotation, and anchor point location on 3D layers. The Function commands are similar, with those same knobs controlling 3 degrees of scale, and orientation. The Custom Function commands are the matching Lumetri variables in AE. One aspect that was I don’t like, is that there isn’t much similarity in the default commands between different applications, so I will be attempting to create custom presets that give the buttons and dials similar functionality between applications, to make it easy for me to remember what they do.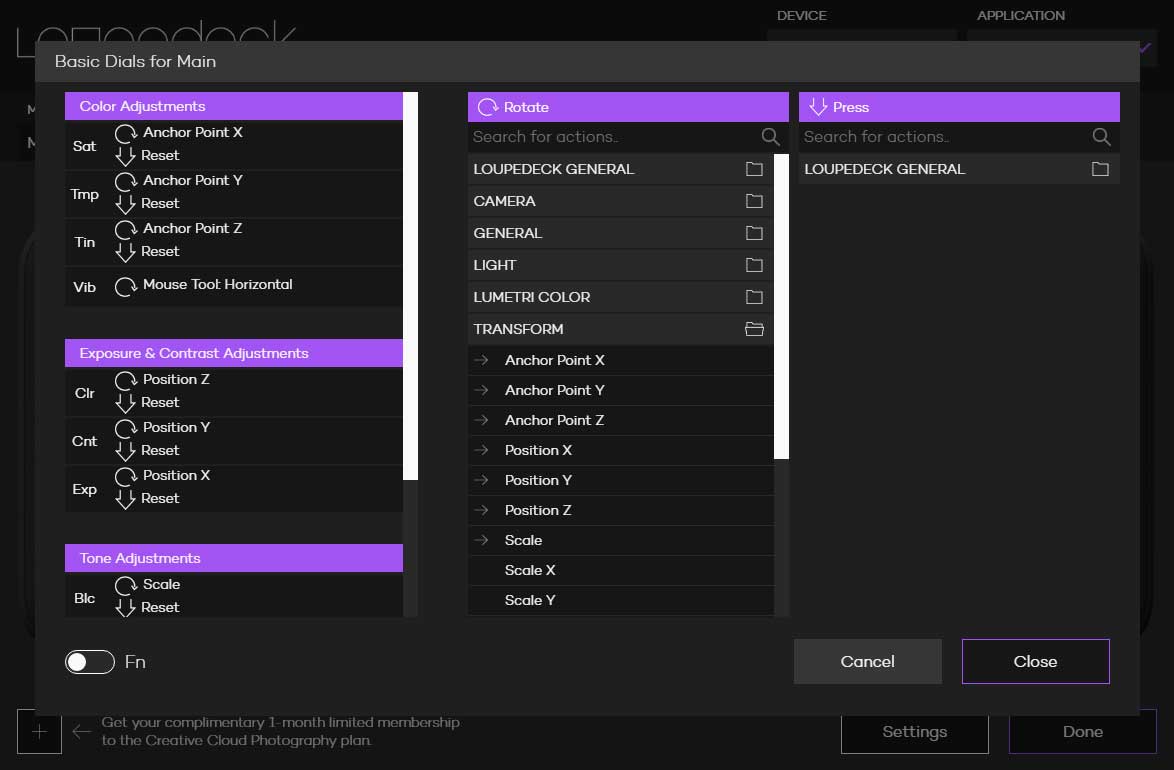
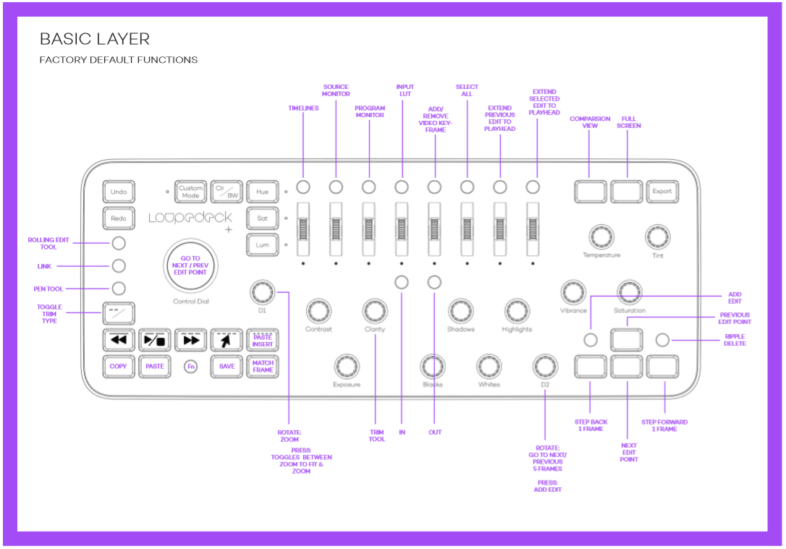
While there is a set of labels on the board for the knobs, they only identify one of many possible default or custom functions. There are maps included in the documentation, including a blank one, presumably for filling out with your own custom functions. And while those might be helpful, and eventually one could potentially memorize all of their own settings, the fact that other applications use the same interface with different functionality presents a further obstacle to developing muscle memory. I want to create my own physical label overlays for the various apps, that would fit over the knobs and buttons to further label their functionality, and could be switched out between applications. My initial idea was to print out a paper one and manually cut out the holes for the buttons and knobs, which would have taken a long time, and been hard to reproduce. Then I remembered a device that I had recently heard about that prints and cuts paper and other flat material. Cricket makes an innovative series of 2D CnC cutters for home use, primarily designed for crafts and decorations. But it seemed ideally suited for cutting a lot of precise holes on a sheet of paper of plastic, that could have labels for the knobs and buttons. So hopefully I will be able to give that a shot, and share the results in the follow on article. It will definitely take some time to adapt my interface instincts to take advantage of the functionality available in the Loupedeck+, but my initial tests have satisfied my original hopes and expectations. More to come, once I have finished the editorial phase of my next big project, and actually have some time to write again. But that will give me a chance to test this thing out to the fullest possible extent.
Dear thanks for the great review and insight.
I am an Documentary Video editor and require speed and precision both. I am currently working on the Premier Pro CC 2019 Ver 13.1 . I have got the Loupedeck.
But cannot find Loupedeck in the SurfaceControl – .. Also cannot find any Loupedeck.acsrf in the Surface control (Plugin Folder) . Do you know how to get this file in place so can start using the LD with Premier Pro CC
Do you have a “Loupedeck+” as the original Loupedeck doesn’t work with Premiere. Are you on Mac or PC? And have you installed the newest driver from https://loupedeck.com/en/setup? You need both the drivers installed and the plug-in in place. Does the Loupedeck work with your other apps?
Pingback: Tailor made movie enhancing overlays for the Loupedeck+ manage area by Scott Simmons | Cool Gadgets
Pingback: Custom video editing overlays for the Loupedeck+ control surface - Online Movies Free to Download
Pingback: Custom video editing overlays for the Loupedeck+ control surface by Scott Simmons | Gadgets
Thank you for taking the time to write this article! I just purchased mine a few days ago and look forward to using it.
Glad you like it. This article is from two years ago, and I have published two further updates about the Loupedeck+ since then, which might be worth looking into for the most up to date information.